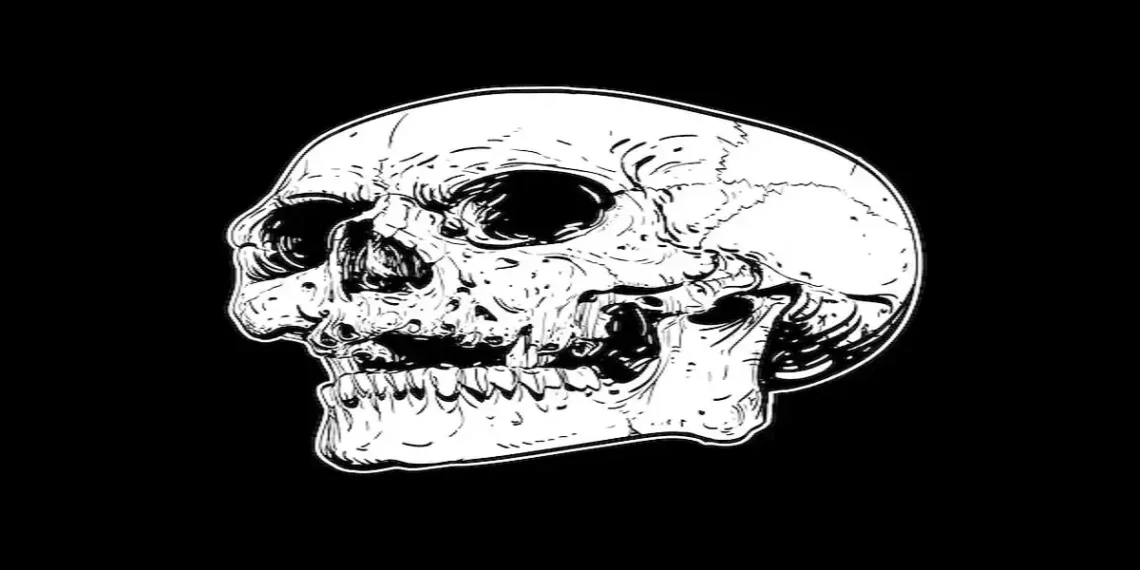
Drawing skulls holds a unique allure for many artists. The intricate details, the balance between life and death, and the opportunity to explore anatomy all contribute to its fascination. Whether you’re a beginner or an experienced artist, mastering skull drawing:oldj_7nsvxk= skull can enhance your skills and add depth to your portfolio. In this guide, we will explore the techniques, tools, and tips for creating realistic and artistic skull drawings.
Understanding Skull Anatomy
Before you start drawing, understanding the anatomy of a skull is crucial. The human skull comprises 22 bones, with the most prominent parts being the cranium (which houses the brain) and the mandible (the jawbone). Familiarize yourself with the following key features:
- Frontal Bone: Forehead region
- Parietal Bones: Sides and top of the cranium
- Temporal Bones: Located near the temples
- Occipital Bone: Back and base of the skull
- Zygomatic Bones: Cheekbones
- Maxilla: Upper jaw
- Mandible: Lower jaw
Study anatomical diagrams and real skulls, if possible, to get a better grasp of these structures.
Gathering Your Tools
Choosing the right tools can significantly impact the quality of your skull drawing:oldj_7nsvxk= skull. Here’s a list of essential supplies:
- Pencils: Use a range of graphite pencils (HB, 2B, 4B, 6B) for different shading effects.
- Erasers: A kneaded eraser works well for subtle highlights and corrections.
- Paper: High-quality drawing paper with a smooth texture.
- Blending Tools: Use blending stumps or tortillons for smooth shading.
- Reference Images: Collect images of skulls from different angles for reference.
Step-by-Step Guide to Drawing a Skull
- Outline the Basic Shape: Start by drawing a simple oval shape for the cranium. Add a horizontal line halfway down the oval to mark the eye level and a vertical line to divide the skull symmetrically.
- Sketch the Jawline: Extend the lower part of the oval to create the jawline. Draw two diagonal lines from the sides of the oval to form the mandible. Connect these lines at the bottom with a curved line for the chin.
- Define the Eye Sockets: Draw two large circles on the horizontal line for the eye sockets. Place them equidistant from the vertical line. Add smaller circles inside these for the eyeballs.
- Add the Nasal Cavity: Between the eye sockets, draw an inverted heart shape for the nasal cavity. This shape should extend slightly below the horizontal line.
- Draw the Cheekbones and Maxilla: Sketch the zygomatic bones by drawing:oldj_7nsvxk= skull curved lines from the outer edges of the eye sockets down towards the jawline. Draw the upper jaw (maxilla) by adding two U-shaped lines below the nasal cavity.
- Detail the Teeth: Draw the upper and lower rows of teeth within the jawline. Teeth should vary in size, with the front teeth larger and the molars smaller.
- Refine the Cranium: Smooth out the outline of the cranium, adding slight curves to make it more natural. Draw the temporal lines and the occipital bone at the back of the skull.
- Shade the Skull: Use a soft pencil (4B or 6B) to add shading. Start with the eye sockets, nasal cavity, and areas beneath the cheekbones. Blend the shading with a blending stump for a smooth transition. Create highlights by gently erasing small areas with a kneaded eraser.
- Add Texture: Add fine lines and texture to indicate cracks, sutures, and other details on the skull surface. Be careful not to overdo it; subtlety often creates a more realistic effect.
- Final Touches: Review your drawing for any inconsistencies or areas that need more shading. Add final touches and details to enhance the overall realism.
Tips for Mastering Skull Drawings
- Practice Regularly: Regular practice improves your skill and confidence. Set aside time each day to draw and experiment with different techniques.
- Study Real Skulls: If possible, study real skulls or high-quality replicas. Observing the three-dimensional structure helps you understand how light and shadow interact.
- Use References: Always use reference images to ensure accuracy. Studying skulls from different angles helps you capture their true form.
- Experiment with Styles: Try different artistic styles, such as realistic, abstract, or stylized skulls. Experimenting with various approaches keeps your work fresh and exciting.
- Focus on Lighting: Understanding how light interacts with the skull’s surface is crucial for realistic shading. Practice drawing skulls under different lighting conditions to master this skill.
- Learn from Others: Study the works of other artists who specialize in skull drawing:oldj_7nsvxk= skull. Analyze their techniques and incorporate what you learn into your practice.
Common Mistakes to Avoid
- Ignoring Proportions: Incorrect proportions can make your skull drawing look unnatural. Pay close attention to the size and placement of each feature.
- Overusing Lines: Using too many lines can make your drawing look cluttered. Focus on shading and subtle lines to create depth and realism.
- Neglecting Anatomy: A lack of anatomical knowledge often leads to inaccuracies. Study skull anatomy thoroughly to avoid this mistake.
- Poor Shading: Inconsistent shading can flatten your drawing. Practice smooth transitions and observe how light affects different areas of the skull.
- Rushing the Process: Take your time with each step. Rushing often results in mistakes and a less polished final piece.
Conclusion
Drawing:oldj_7nsvxk= skulls offers a unique blend of challenge and reward. By understanding the anatomy, using the right tools, and practicing regularly, you can create stunning and realistic skull drawings. Remember to study real skulls, use references, and experiment with different styles to keep your work dynamic and interesting. Avoid common mistakes by paying attention to proportions, lines, and shading. With dedication and practice, you will master the art of drawing skulls and enhance your overall artistic skills. Happy drawing!